| HideElements | ||||||||||||||||||||||||||||||||||||
|---|---|---|---|---|---|---|---|---|---|---|---|---|---|---|---|---|---|---|---|---|---|---|---|---|---|---|---|---|---|---|---|---|---|---|---|---|
|
| Background Color | ||||||||||||
|---|---|---|---|---|---|---|---|---|---|---|---|---|
| ||||||||||||
|
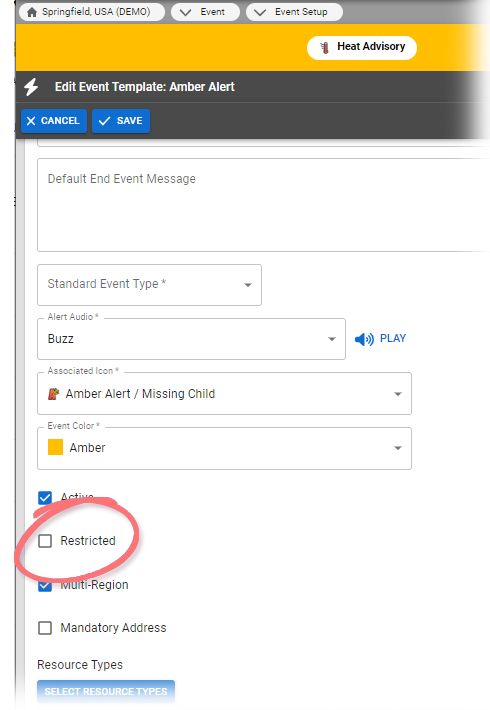
If you want to
identify people who can manage
an event type
, you can do so
on the event template. The users you specify in the template's Event Security
page are allowed to activate and update this type of event.

![]()
This feature is available if security is enabled from within the template (that is, if the
Restricted icon appears locked in the template's
Restrictedcolumn
on Event
Templates.
To set up
event restrictions
- In the main menu, click Event and then click Event Setup. The Event Templates page opens.
Take one of these actions.
If you want to... Then... Create a new event restriction - Click Edit. The Edit Event Template: (event template name) page opens.
- Select the Restricted checkbox.
- Select the Standard Event Type.
- Click Save. The Event Templates page reopens.
- Locate the template and, on that row, click (event template name). The View Event Template: (event template name) page opens.
Manage/update event restrictions
- Locate the template and
- , on that row, click (event template name). The View Event Template: (event template name) page opens.
- Click Restrictions
- . The Event Security for (event template name) page opens.
- Select the
- checkboxes for
- people you want to have event management rights
- (users who may activate/update event).
- Click Save.
| borderColor | #000000 |
|---|---|
| titleColor | #000000 |
| titleBGColor | #D3D3D3 |
| title | Helpful Links |