| HideElements | ||
|---|---|---|
|
|
|
| Background Color | ||||||||||||
|---|---|---|---|---|---|---|---|---|---|---|---|---|
| ||||||||||||
|
When you create an event, you choose an event template that helps you define details for that specific type of event. The list of templates shows the icon that will be associated with the event, the name of the template, the event type, and the template description.

You may be granted the right to create and maintain ad hoc events. These are generally emergencies for which your region does not have an appropriate template set up.
If you have the appropriate rights and access to multiple regions, you may be able to create a multi-region event. This topic covers how to:
Create an event (single region).
Depending on your permissions, you may be able to create events, including ad hoc and multi-region events. Events are created from templates that include an icon, and ask you to enter specific details.
Note: Prior to creating an ad hoc event,
you should create
the appropriate status types
and associate them with the resource types
for the event.
After creating an event, if you specified an address, you can open the Map view to see the event icon
at the specified location. Click the icon to view the event details.
Alternatively, select the event in the Event Resources field
to limit the view to only resources associated with
that event.
Keep the following in mind about event creation:
- The Title and Information fields may contain default text that provides a
- generic description of
- the event type
- . You can
- use the default text or edit to replace it.
- By default, events end 24 hours from the date and time you create
- them.
- By default, the Display in Event Banner check box is selected,
- and the
- event will
- appear in the event
- bar at the top of
- EMResource
- .
- If you do not want the
- event displayed in the banner
- , clear the Display in Event Banner check box.
- For certain types of events, especially those created to coordinate and track emergency response, certain address details (City, State, and County)
- may be required. If they are, two asterisks (**) appear next to the field label.
- In specifying a location, you can enter minimal details (such as city and state) and then look up the address. In the map, click the location icon and drag it to the appropriate spot in the map.
| Anchor | ||||
|---|---|---|---|---|
|
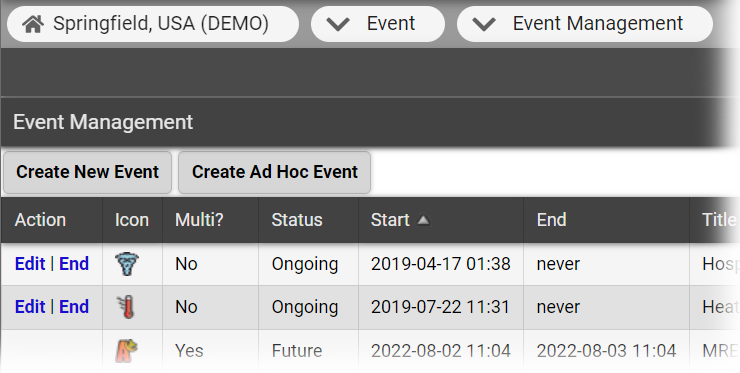
In the main menu, click Event and then click Event Management. The Event Management page opens.
Click Create New Event. The Select Event Template page opens.
Locate the template you want to use
and, on that row, click Create
. The Create
Event page opens.
Enter this information
.
Field
Description
Title
Name of
the event
.
Information
Additional details about
the event.
Event Ends
Date and time the event is scheduled to end automatically. Alternatively, the event can be open-ended with no specified end date and time.
Drill?
When selected, identifies the event as a drill.
To provide more detail, click Show more settings. Additional fields appear.
Enter this information.
Field
Description
Street Address
Number and name of the street at which the event is located.
City
Name of the city in which the event is located.
State
Abbreviation for the state in which the event is located.
Zip Code
United States Postal ZIP Code in which the event is located.
County
State county or parish in which the event is located.
Latitude/Longitude
Geographic coordinates where the event is located. To obtain the exact Latitude and Longitude, click Look up Address.
Event Start
Start date and time for the event; the default is Immediately.
However, you can set a start date in the future (
for example, for exercises and training sessions
).
Event End
Interval at which the event will end automatically, the date/time the event is scheduled to end, or open-ended (not specified end) (required).
Tip: You can attach
Attached File
Attaching a file to the event
makes it available to
associated
users. The following file types can be attached: PDF (.pdf), text (.txt), and web page (.html).
- Click Choose File. Your browser explore window opens.
- Locate and
- click the file.
- Click Open. The
- Create
Field
Description
- Event page shows the path and filename for the attachment.
As appropriate, complete the appropriate fields:
Display in Event Banner?
When selected, the event will appear in the event banner at the top of every page. This option must be selected for events
that do not have resources.
Private?
When selected, the user only sees information for
resources with which
Drill?
Specifies this is a drill (when selected).
they are associated.
End Quietly?
When selected, allows you to end the event without sending notifications to participants and other interested parties
.
Select the appropriate re-notification option:
Field
Description
Re-notify
Indicates whether
Disabled
follow-up notifications
are sent and if so, what time or how frequently they are sent.
- Disabled. No additional notifications will not be sent automatically.
- Every n hours
- , starting (date) at (time)
System sends follow-up notifications at the interval you select (such as 1 hour, 10.5 hours) beginning at the date and time you specify.
at specified times
System sends follow-up notifications at the times you specify.
Click the add button to add more times to the list.
Clear a time's check box to disable it.
Specify all or part of the address for the event, including the Street Address, City, State, Zip Code, and/or County.
For a more detailed description of the location, click View Map.
To obtain the exact Latitude and Longitude of the address information you entered, click Lookup Address.
If appropriate, click and drag the icon on the map to the location you want.
Click Save or specify resources for this event.
By default, the Create New Event page shows every resource associated with the specific event template (if any). You can select resources that are to participate in this event (that is, those that are to report additional event status types).
- . At the specified interval, on the specified date and time, additional notifications will be sent automatically.
- At specified times. At the specified times, additional notifications will be sent automatically.
- In the Resources to Participate in This Event area, select the checkbox for resources you want to include in this event. The event icon appears next to selected resources in Views.
Note: All resources associated with the event template are displayed. Selected resources are requested to update their event status types, in addition to their daily status types. Selected resources do
- not indicate who will receive notifications regarding
- the event. Refer
- for more information.
Tip: Use the search feature in the Resources to Participate in This Event section to narrow the results that appear in the page and make it easier to identify the resources to be involved.
Click Start Event.
| Anchor | ||||
|---|---|---|---|---|
|
- In the main menu, click Event and then
- click Event Management. The Event Management page opens.
- Click Create
- Ad Hoc Event. The Create
- Ad Hoc Event page opens.
- Enter
Field | Description |
|---|---|
Title | Title of this event (required). |
Information | Additional details about the event (required). |
Event Start | Start date and time for the event; the default is Immediately. You can set a start date in the future (such as for exercises and training sessions) (required). |
Event End | Interval at which the event will end automatically, the date/time the event is scheduled to end, or open-ended (not specified end) (required). |
Tip: You can attach a file to the event, which is then available to any user associated with the event. You can upload the following file types: PDF (.pdf), text (.txt), and web page (.html).
Click Open. The window closes. The Create New Event page shows the path and filename for the attachment.
Complete the appropriate fields:
Field | Description |
|---|---|
Display in Event Banner? | Display in event banner on view pages to announce the event (when selected). This option must be selected for events for which no resources have been identified. |
Private? | Display to a user information for only those resources with which the user is associated (when selected). |
Drill? | Specifies this is a drill (when selected). |
End Quietly? | End event without sending notifications to participants and other interested parties (when selected). |
Select the appropriate re-notification option:
Field | Description |
|---|---|
Disabled | System does not automatically send follow-up notifications. This is the default setting. |
Every n hours Starting (date) at (time) | System sends follow-up notifications at the interval you select (such as 1 hour, 10.5 hours) beginning at the date and time you specify. |
at specified times | System sends follow-up notifications at the times you specify. Click the add button to add more times to the list. Clear a time's check box to disable it. |
Specify all or part of the address for the event, including the Street Address, City, State, Zip Code, and/or County.
For a more detailed description of the location, click View Map.
To obtain the exact Latitude and Longitude of the address information you entered, click Lookup Address.
If the event should include all resources from participating regions, select Include all resources. Otherwise, clear it.
For each region participating in the event, select the appropriate template.
Click Next. The confirmation page opens, or a page opens for every region you selected.
In each region page, select specific resources and click Next. The confirmation page opens.
Tip: Use the search feature in the Resources to Participate in This Event section to narrow the results that appear in the page and make it easier to identify the resources to be involved.
- the requested information (see the procedure Create an Event above for field descriptions).
- Click Next. The Select Resources page opens.
- Locate and select the check box for resources you want to include in this event. The event icon will appear next to selected resources in Views.
Note: All resources associated with the event template are displayed. The resources you select will receive a request to update their event status types (in addition to their daily status types); however, selected resources will not necessarily receive event notifications regarding the event. Refer to Set Up Template Notifications for more information. - Click Next. The Select Status Types page opens.
- Locate and select the check box for status types (associated with the selected resources) that you want to monitor.
- Click Next. The Ad Hoc Event Confirmation page opens.
- Review the information you entered and when you are ready to create the event, click Yes.
| Anchor | ||||
|---|---|---|---|---|
|
Note: Creating a multi-region event may take
several minutes to complete.
- In the main menu, click Event and then click Event Management. The Event Management page opens.
Click Create
New Multi-Region Event. The Create
Multi-Region Event page opens.
- Enter
Field
Description
Title for this ad hoc event
Title of this event (required).
Information for this ad hoc event
Additional details about the event (required).
Event Start
Start date and time for the event; the default is Immediately.
You can set a start date in the future (such as for exercises and training sessions) (required).
Event End
Interval at which the event will end automatically, the date/time the event is scheduled to end, or open-ended (not specified end) (required).
Tip: You can attach a file to the event, which is then available to any user associated with the event. You can upload the following file types: PDF (.pdf), text (.txt), and web page (.html).
Locate and select the file.
Click Open. The window closes. The Create New Event page shows the path and filename for the attachment.
As appropriate, complete the appropriate fields:
Field
Description
Display in Event Banner?
Display in event banner on view pages to announce the event (when selected). This option must be selected for events for which no resources have been identified.
Private?
Display to a user information for only those resources with which the user is associated (when selected).
Drill?
Specifies this is a drill (when selected).
End Quietly?
End event without sending notifications to participants and other interested parties (when selected).
Select the appropriate re-notification option:
Field
Description
Disabled
System does not automatically send follow-up notifications. This is the default setting.
Every n hours Starting (date) at (time)
System sends follow-up notifications at the interval you select (such as 1 hour, 10.5 hours) beginning at the date and time you specify.
at specified times
System sends follow-up notifications at the times you specify.
Click the add button to add more times to the list.
Clear a time's check box to disable it.
- the requested information (see the procedure Create an Event above for field descriptions).
- Click Next. The Select Resources page opens.
In the Resources to Participate in This Event area, take one of these actions.
If you want to...
Then...
Include all resources from all participating regions,
Select the Include all resources check box.
Only include some resources from certain regions,
- Clear the Include all resources check box and for each region, select the appropriate template.
- Click Next. A page opens for every region you selected.
- On each region page, select specific resources and click Next. The confirmation page opens.
Tip: Use the filter and search options to reduce the number of resources
For a more detailed description of the location, click View Map.Specify all or part of the address for the event, including the Street Address, City, State, Zip Code, and/or County.
To obtain the exact Latitude and Longitude of the address information you entered, click Lookup Address.
If appropriate, click and drag the icon on the map to the location you want.
Click Next.
The Select Resources page shows every resource that you are authorized to include as participants in this event (that is, those that are to report additional event status types).
Selecting a resource indicates the resource will be asked to update event status types in addition to their specified daily status types. Furthermore, the event's icon displays next to the resource's name in Views. Selecting a resource means that those associated with the resource who have signed up to receive ad hoc event notifications are notified of the event.
Tip: Use the search feature in the Resources to Participate in This Event section to narrow the results that appear in the pageand make it easier to identify the appropriate resources
.
- Click Next. The Select Status Types page opens.
- Locate and select the check box for status types (associated with the selected resources) that you want to monitor.
- Click Next. The Multi-Region Event Confirmation page opens.
- Review the information you entered and when you are ready to create the event, click Yes.
To indicate individual resources, select the check box in the first column for each resource. To include all resources in your current list, select the check box in the Resource column header. When you are done searching for and selecting resources, click Next. The Select Status Types page shows the relevant status types for the resources you selected in the previous page.
To indicate individual types, select the check box in the first column for each status type. To include all status types in your current list, select the check box in the Status Type column header. When you are done, click Next. The Ad Hoc Event Confirmation page opens, showing high-level details.
From here, you can use the Previous button to return to setup pages to make changes, or click Yes to confirm creation of the ad hoc event.
| borderColor | #000000 |
|---|---|
| titleColor | #000000 |
| titleBGColor | #D3D3D3 |
| title | Helpful Links |