| HideElements | ||||||||||||||||||||||||||||||||||
|---|---|---|---|---|---|---|---|---|---|---|---|---|---|---|---|---|---|---|---|---|---|---|---|---|---|---|---|---|---|---|---|---|---|---|
|
| Background Color | ||||||||||||
|---|---|---|---|---|---|---|---|---|---|---|---|---|
| ||||||||||||
|
During planning, you can add files, up to 50 MB in size, to plans in your organization's Resource Documents folder. However, you cannot upload web page files (with the extension .htm or .html) to your library.
Tip: Some browsers allow you to upload multiple files simultaneously. If you choose to upload several files at once, these files must reside in the same location. Use the Shift or Control key to select more than one file.
To add a file
Point to Planning and click Library. The Library page opens.
Select the appropriate domain or facility from Library for.
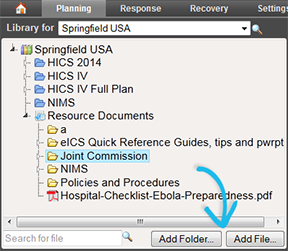
On the left, navigate to the location where you want to add the file.
Click Add File. The Add File window opens.
Click Browse. The Choose File to Upload window opens.
Navigate to the file, select it, and click Open. The window closes. The file you selected appears in the File to upload field.
If appropriate, enter comments about the file.
Click OK.
| Panel | ||||||||
|---|---|---|---|---|---|---|---|---|
| ||||||||