|
You can add to or change the ICS positions associated with a file.

To add or change ICS positions for a file
Point to Planning and click Library. The Library page opens.
For Library for, select the appropriate domain or facility.
On the left, navigate to the location that contains the file.
Click the file.
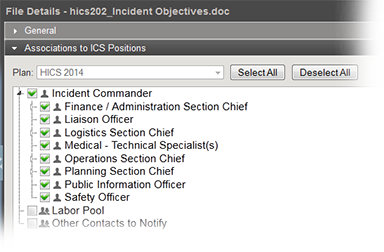
On the right, click the Associations to ICS Positions drawer. The drawer shows the positions currently associated with the file for the selected plan and those you can add.
If you are in the Resource Documents library, select the applicable plan.
To associate a position with the file, select the position's check box.
To remove a position's association with the file, clear that position's check box.
To associate all positions with the file, click Select All.
To remove all associations, click Deselect All.
Click Save.