![]()
The File Library plugin allows WebEOC users to upload and share documents and files with other users via WebEOC. The file shared could be a standard operating procedure, a situation report, a PDF, an image, or any other file type. Depending on the permissions granted, users can view, add, and/or delete files from the library.
If you are unable to access the File Library or need to have edit and/or delete permissions, contact your WebEOC administrator.
To add a file in the File Library
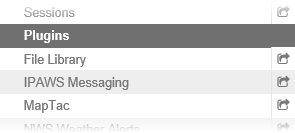
In the Plugins section of the control panel menu, click File Library.
From the Master Folder List section, click the folder name.
Note: A Folder List contains a list of files/documents. If no folder names appear, you have not been granted permission by your administrator to access the folders.On the File List page, click Create File.
Note: If your administrator has not configured read/write permissions to the folder in the File Library, the Create File button does not appear.
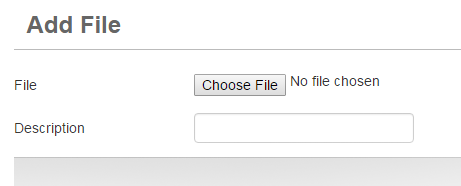
Tip: Before adding a file, check with your administrator to find out whether there are any size limitations to uploading a file.In the Edit File window, click the Browse or Choose File button.
Follow browser prompts to select the file you want to add.
If appropriate, enter a description for the file.
Click Save. On the File List page, the most recently added file appears at the top of the list.