![]()
To manage library files effectively, it is important to use the check out process. Checking out a document lets other people know the document is in use by putting a virtual lock on the document. Other people can still view the document and, if necessary, they can discard your check out to open and edit the last saved version.
If you have Microsoft® Office® 2010 or later on your computer and are using Internet Explorer®, Firefox®, Firefox ESR, Chrome® or Safari® to access eICS, when you check out a Microsoft Office document the browser will request permission to open the document using the relevant Microsoft Office application. Documents opened and edited this way are saved directly to eICS.
Tip: If you want to view a document before deciding whether to edit it, in the General drawer, click Download to View. The file is downloaded to your computer, but not checked out for editing.
After editing is complete, the document should be checked in to indicate that the document is available for use by others. For more information about working with Microsoft Office documents, read the articles: Microsoft Office Integration and Make eICS a Trusted Site.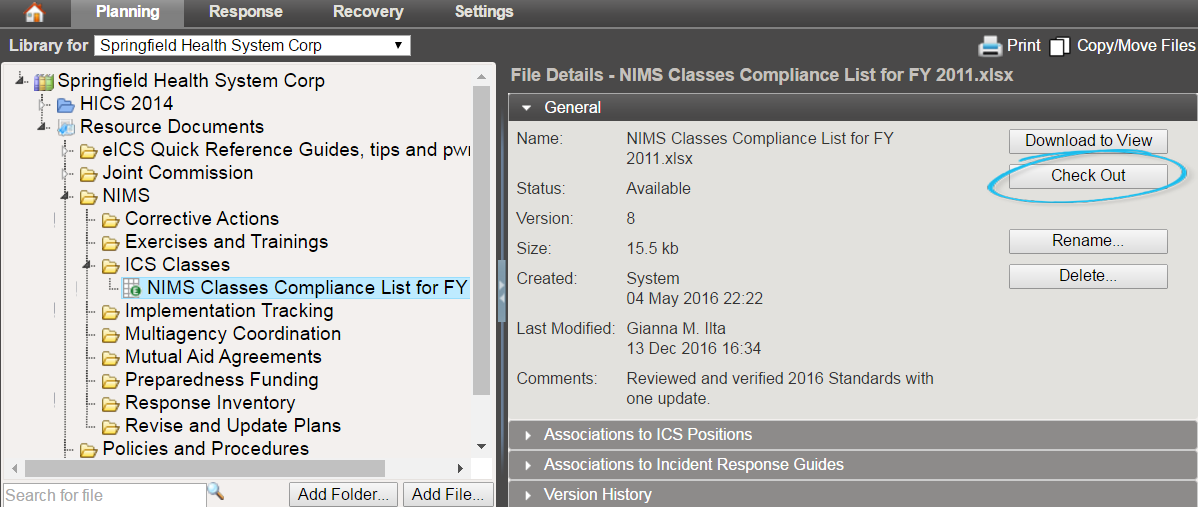
Note: The check out/check in process for Microsoft Office documents may vary slightly if you have more than one document checked out at the same time. For instance, you may be required to save the document to your computer and check it in from there.
To check out and edit a Microsoft Office document
From the Home page, point to Planning and click Library. The Library page opens.
If necessary, in the Library for list, select your domain or facility.
On the left, locate and click the file you want to edit.
On the right, in the General drawer, click Check Out. The file is checked out and your browser opens a window requesting permission to open the document with the Microsoft Office application.
On the browser window, click Open, Allow, or Launch (the browser message and button text are different depending on which browser you are using) to open the document with the Microsoft Office application.
In the Microsoft Office application, edit, save, and close the document as necessary. Saving the document automatically creates a version of the document in eICS, but the document still needs to be checked in. Checking in the document indicates that your edits are complete and the document is ready for use by others.
When appropriate, continue with the procedure to Check In a File.
To check out and edit other types of documents
From the Home page, point to Planning and click Library. The Library page opens.
If necessary, in the Library for list, select your domain or facility.
On the left, locate and click the file you want to edit.
On the right, in the General drawer, click Check Out. The document is downloaded and opened with the appropriate application.
In the application, edit, save, and close the document as necessary. Saving the document replaces the original file in your Downloads folder or as specified according to your browser settings. The document still needs to be checked in to make your edits available for others.
When appropriate, continue with the procedure to Check In a File.