![]()
During an incident, you can edit locations to the map that identify buildings, incidents, landmarks, people, vehicles, or weather to visually describe how the incident is unfolding and update participants so they can safely and successfully navigate the incident. You can also enable or disable locations to change the visibility of the location on the map.
To edit a location
On the Home page, in the list of Active Incidents, locate the incident and click View. The Incident Dashboard opens.
Click the Map tab.
On the left, in the list of locations, click the location you want to edit. Alternatively, on the map, click the icon for the location you want to edit. The location is identified in the list and its name, description and an Edit link appear on the map.
On the map, in the location details box, click Edit. The Edit Location window opens.
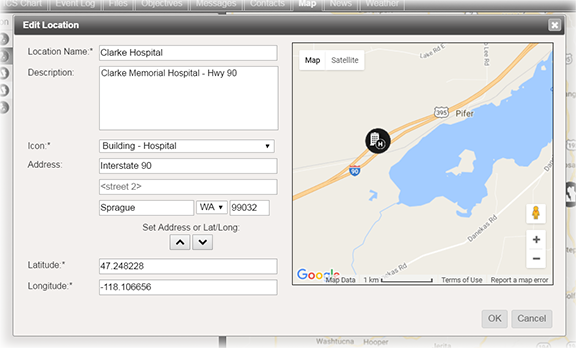
As necessary, edit the Location Name, Description, Icon, Address, or Latitude and Longitude.
Note: If you make changes to the Address or the Latitude and Longitude, click the up or down arrow to update the corresponding fields.Click OK. The Edit Location window closes.
To disable or enable a location
On the Home page, in the list of Active Incidents, locate the incident and click View. The Incident Dashboard opens.
Click the Map tab.
On the left, in the list of locations, click the location you want to disable or enable.
Take one of these actions.
If you want to... Then... Disable a location, On that row, in the Disable column, select the checkbox.
Enable a location, On that row, in the Disable column, deselect the checkbox.