![]()
The Filters tab includes powerful search criteria that allow you to pinpoint the clients and details you need.
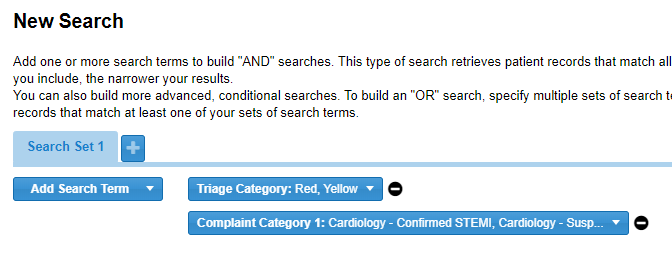
You can perform a one-time search to locate patient and client records. You can also save a search, making it a reusable filter. Filters are the building blocks for creating gadgets to use in designing and building your dashboards. Saving a filter involves naming it and selecting display options to define how your search results should be presented within the gadget.
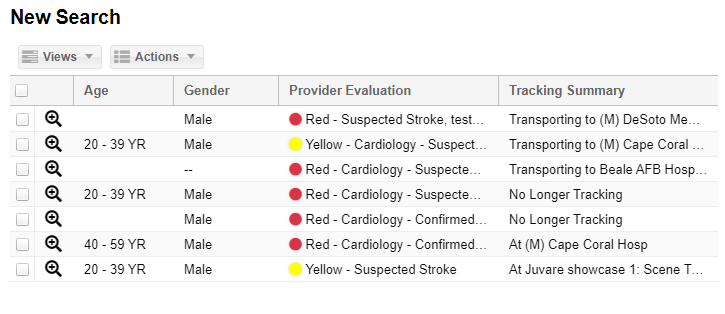
For each filter to be applied to Client List gadgets, you need to specify the columns that appear. By default, the filter will include the Age, Gender, Provider Evaluation, and Tracking Summary. You can add columns to the filter and remove them. To be used for a client list, you must have at least one column specified.
The filters you can use are available to you from the Filters tab, including the filters you created (personal), your division owns, and administrators shared with you. You can apply shared filters to gadgets in your dashboard, but you cannot edit them.
Filters Tab
When you click the Filters tab, the New Search option opens by default. Click the Find Filters link in the left pane to view all filters that are available to you.
Find Filters
Use the Find Filters window to locate the filter you want to view or edit. Each filter is listed by name and the window also shows its Owner. The owner is the individual or entity that created the filter and/or can edit it.
This window displays up to three tabs:
- The filters you created appear in the My Filters tab. Your name appears in the Owner column.
- If you are an administrator, you have access to division-level filters and these appear in a tab labeled with the division's name. Your division appears in the Owner column. Any administrator at this division can edit these filters.
- The All tab of the Find Filters window provides access to all filters that are available to you, including the ones you have created, those available to your division (if you are an administrator), and those that have been shared with you. You cannot edit the filters you do not own, but may be able to copy a shared filter to create a new one.
When you click a filter, this window closes and the filter's details appear in the right pane of the Filters tab.
Owners
As a user, you are automatically the owner of any filter you create.
If you are an administrator, you can create personal filters that you own and that only you can use. You can also expand ownership of the filter by designating your division as the Owner. This allows any other administrator in your division to reconfigure the filter. When any authorized administrator makes changes, the filter is changed for every user who has any level of access to it.
To expand ownership, select your division in the Owner field of the Save window.
If you are a Regional Administrator, you can make your region the owner, allowing all other administrators at your level to use and edit it.
Note: Users who are not administrators can create dashboards and filters, but they are for personal use only.
Sharing
As an administrator, you can share your filters with other administrators and users. Sharing it means those users can select it as the filter for a client-related gadget, but cannot reconfigure or edit it.
As an example, you decide that this filter should be available to all users with the ED Admin role at your facility. You can set or change this sharing access when you save the filter.
Depending on your role and level of access, you may be able to add shares by role, division type, and a specific division (provider). The specific sharing options available to you depend on the options you select from the first Add Share drop-down list.
The All tab of the Find Filters window provides access to all filters that are shared with you and that you share with others. Though you cannot edit these filters, you can copy a shared filter to create a new one.
Note: Users who are not administrators can create dashboards and filters, but they cannot share them.