![]()
If your Domain Administrator unlocked the chart for an incident, you may be allowed to change the chart such as renaming your labor pool, other contacts, and their respective groups. You can also add and remove groups, build depth charts, and more. Your Domain Administrator can also unlock the chart for a particular incident while it is in progress.
If your plan includes the Labor Pool and Other Contacts Groups, they appear in the left area of your Plan Summary page.
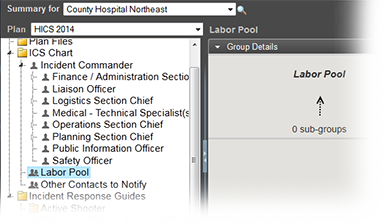
On the Incident Dashboard, they appear on the left area of the ICS Chart tab.
Your Labor Pool consists of individuals not directly involved with patient care and not associated with a predefined ICS position. These individuals can include facility employees in Human Resources, administration, and food services, for example. During an incident, your Command Staff may need to call on these individuals to address immediate nonmedical needs, such as the transportation of patients.
Your Other Contacts to Notify list consists of individuals not directly involved with incidents, but who need to be notified when an incident occurs. By default, these individuals are not included in your list of candidates, but they can be enlisted to assist during an incident.
The system also allows you to create a two-level hierarchy by adding subgroups within these groups. In this way, you can organize contacts using any categories that work for this plan, such as the role these contacts may take on during an incident. You can rename your labor pool, other contacts, and their subgroups, add and remove subgroups, build depth charts, and more.
Refer also to About the ICS Chart.
During Planning or Response
To access the chart
Do one of the following:
Open the incident dashboard and click the ICS Chart tab.
Point to Planning and select Plan Summary. In Summary for select the facility or domain, and in Plan select and the appropriate plan.
To rename a group
In the chart on the left, select Labor Pool or Other Contacts to Notify. The right area shows the details.
Open the Group Details drawer.
Click Rename Group.
For New Name, enter a new name for the group.
Click OK.
To add subgroups
In the chart on the left, select Labor Pool or Other Contacts to Notify. The right area shows the details.
Open the Group Details drawer.
Click Add Sub-Groups.
For Sub-Group(s), enter the name of the group or groups.
Click OK.
To delete a subgroup
Important: You cannot undo this action.
In the chart on the left, expand Labor Pool or Other Contacts to Notify.
Select the subgroup you want to delete.
In the Group Details drawer, click Delete Group. A window opens asking you to confirm the deletion.
Click Yes.
During Planning
To add or delete a contact
In the chart on the left, select Labor Pool or Other Contacts to Notify, or expand one of these groups and select a subgroup. The right area shows the details.
Open the Contacts or Group members drawer.
Click Add or Add Group Member. An add window opens.
Optionally, to search for a contact, enter the name in the Search Contacts field and click the magnifying glass icon.
Optionally, to view all contacts in a health system, select the Show all Health System Contacts check box.
Select the contacts you want to add to the group or subgroup.
Click OK.
To delete a contact from the pool or group, select the contact in the group's Contacts drawer and click Remove.
To activate and deactivate IRGs
In the Plan Summary, select a group on the left and the details appear on the right. You can define which IRGs are active for a group on the Active Incident Response Guides drawer. To view only active IRGs, select the Show selected only check box. To Click Undo at any time to erase your last action.
On the left, click Labor Pool, Other Contacts to Notify, or a subgroup. Group details appear on the right.
Open the Active Incident Response Guides drawer.
To activate an IRG, select its check box.
To deactivate an IRG, clear its check box.
Click Save.