![]()
The Document Library allows you to store documents in EMResource and make them available to the people in your region. You must have the appropriate permissions to add documents to the library, create and manage folders, and delete and move documents.
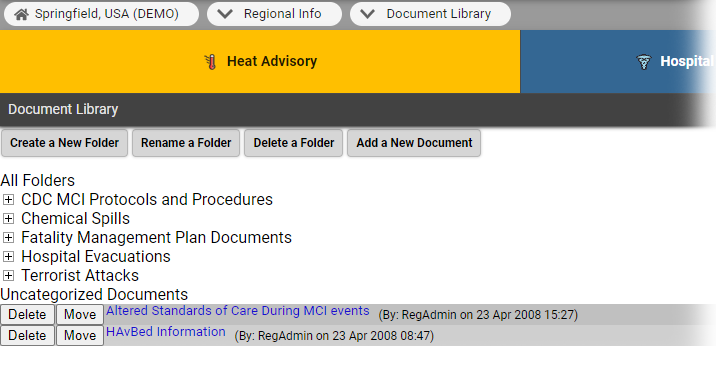
The document library is structured as a hierarchy of folders and files. The top level of the library is labeled All Folders. At this level, you can have folders and files. Click the plus sign to expand a folder and click the minus sign to collapse it. Documents at this level appear under the header Uncategorized Documents.
Note:
- You can add the following types of documents: web page (.html), text file (.txt), or PDF (.pdf).
- The maximum size of a document/file you can upload to the library is 5 MB.
To create a folder
- In the main menu, click Regional Info and then click Document Library. The Document Library page opens.
- Click Create a New Folder. The Create New Folder page opens.
- For Folder Name, enter an easily distinguishable name.
- If appropriate, in Folder Description, enter a description.
- For Create in, click to specify where in the hierarchy you want this folder to be located (for example, All Folders or within a subfolder).
- Click Save. The Document Library page opens.
To add a document
- In the main menu, click Regional Info and then click Document Library. The Document Library page opens.
- Click Add a New Document. The Add a Document page opens.
- For Title, enter an easily distinguishable name.
- For Attached File, click Choose File. Your browser window opens.
- Locate and select the file you want and click Open. The window closes. The page shows the file's path and filename.
- For Create in, click to specify where in the hierarchy you want this document to be located (for example, All Folders or within a subfolder).
- Click Save. The Document Library page opens.
To move a document
- In the main menu, click Regional Info and then click Document Library. The Document Library page opens.
- Locate the document and, on that row, click Move. The Move a Document page opens.
- For Move document to, click to specify where in the hierarchy you want this document to be located (for example, All Folders or within a subfolder).
- Click Move. The system moves the document to its new location.
To delete a document
- In the main menu, click Regional Info and then click Document Library. The Document Library page opens.
- Locate the document and, on that row, click Delete. A window opens asking you to confirm the deletion.
Note: Keep in mind this removes the document from the region library, not just your view of the library. - Click OK.
To rename a folder
- In the main menu, click Regional Info and then click Document Library. The Document Library page opens.
- Click Rename a Folder. The Select Folder to Rename page opens.
- For Select Folder, click the folder you want to rename. The Edit Folder page opens.
- If appropriate, edit the name and/or description of the folder.
- Click Save. The Document Library page opens.
To delete a folder
- In the main menu, click Regional Info and then click Document Library. The Document Library page opens.
- Click Delete a Folder. The Delete Folder page opens.
- For Select Folder, click the folder you want to delete.
- Take one of these actions.
- To delete all folders and documents within the folder you are deleting, select the Delete documents too? checkbox.
- To retain the folders and documents within the folder you are deleting, clear the Delete documents too? checkbox.
Note: These items are moved to the top level of the library under the label Uncategorized Documents. - Click Delete. The Document Library page opens.