![]()
Some log entries are automatically generated for an incident. When you choose to share an incident with your health system, region, or Juvare Exchange, certain automatic log entries are visible for or sent to the sharing entities. However, you can choose whether to share manually created log entries.
During an incident, you can manually add entries such as Major Event, Decision Made, Notification, Other/Misc, Process Improvement, Safety Briefing, and Situational Update to the Event Log.
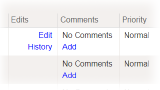
A link appears in the Edits column for entries you can edit. When an entry has been shared, it is no longer possible to edit the entry; however, you can share the entry more widely if needed. If changes have been made to the entry since it was created, a History link is displayed that allows you to review the changes.
Additionally, you can comment on any type of entry to add information about issues, questions, or suggestions that occur related to an entry. Comments on log entries are not shared with Juvare Exchange.
To create and share a log entry
- On the Home page, point to Response and click Incidents.
- Locate the incident in the list and, on that row, click View. The Incident Dashboard
- Click the Event Log
- Click New Log Entry. The New Log Entry window opens.
Enter this information.
Field
Description
Example
Type
Type of manual entry.
Major Event, Decision Made, Notification, Other/Misc, Process Improvement, Safety Briefing, or Situational Update
Current Time/Previous Time
Do you want the entry timestamp to reflect the current time or a previous date and time?
Not applicable
Priority
Significance or urgency of the entry.
Low, Normal, or High
Description
Notes or information about the entry.
Not applicable
Sharing
If enabled, identifies with whom you want to share the log entry.
- Share with health system incident
- Share with coalition incident
- Share with state and/or region
- Share with JX
- Click Save and Close or Save and Add. The window closes and the new event appears on the page.
To locate and edit an entry you created
On the Home page, point to Response and click Incidents.
Locate the incident in the list and, on that row, click View. The Incident Dashboard opens.
Click the Event Log tab.
Near the top of the page, click Change Filter. The Select Entry Types window opens.
Clear all options except Manual Entry.
Click Save. The window closes and only the selected type of entries appear in the log.
Locate the entry you want to edit and, on that row, click Edit. The Edit Log Entry Text window opens.
Edit the entry details.
Click Save.
To add a comment to an entry
On the Home page, point to Response and click Incidents.
Locate the incident in the list and, on that row, click View. The Incident Dashboard opens.
Click the Event Log tab.
Locate the entry to which you want to add the comment and, on that row, click Add. The Add Event Log Comment window opens.
In the Comment field, enter your questions, notes, or suggestions.
Click Save. The window closes and the Comment column for that entry shows the number of comments and includes a View link to read the comment.