![]()
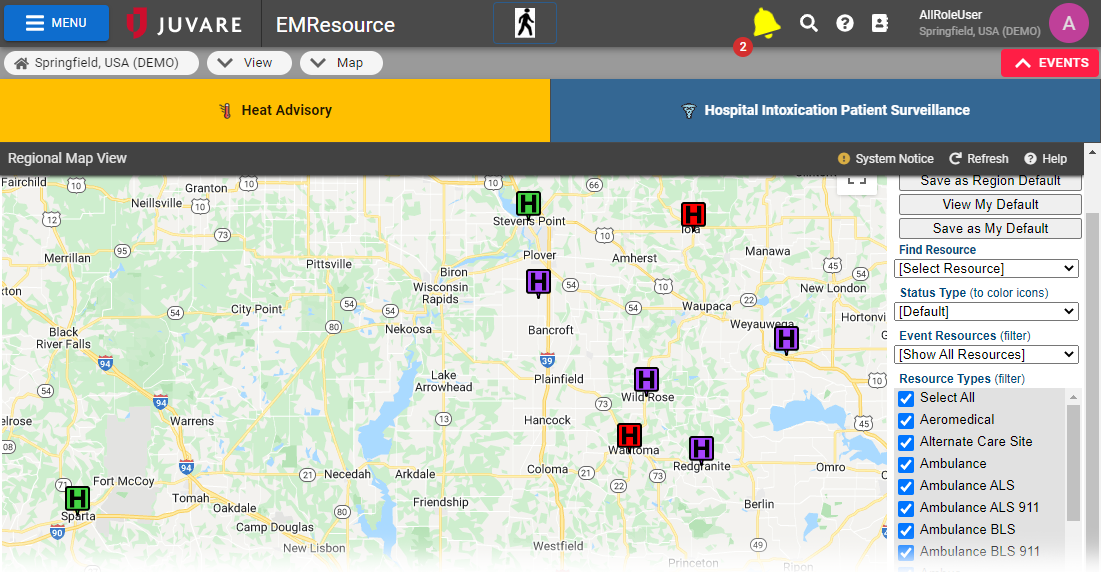
Each region configures one default Map view. By default, the view shows the region you logged in to. The map shows an icon for each resource your regional administration included in the view (based on resource type), and the icon's color reflects the resource's status. A user can configure their own default map view.
Note: Map views are also available when you add resources and set up other resource elements. Each of these features is covered in the appropriate procedure or topic.
Map Elements
Item | Description |
|---|---|
Refresh | The map refreshes automatically every three minutes. You can also refresh the information immediately by clicking the refresh button in the upper right corner of the view. |
Click and drag Map controls | You can move the area of the map you are viewing by clicking in the map and dragging. You can also use the map controls to change the view. Note: EMResource uses Google Maps™. Use Google's standard map tools to zoom in and out, move the map to change focus, view traffic and/or satellite information, and more. |
Resource icons | Icons identify resources and their current status. The colors of resource icons help you quickly identify the statuses of the resources that appear in the map. If users working with an event provide location details, the event appears on your map. |
Viewing options | The page also provides a number of viewing options that help you move to another map view or pinpoint in the map the resources you want to view. |
Resource Icons
Your administration assigned an icon to each resource type and type of event. The map displays the location of each resource and event by showing its icon. You can search for resources and the map shows the results of your search. In addition to the Google Maps™ features, you can perform a number of resource-specific actions in the map. Click a resource or event in the map. A pop-up opens showing various details for the resource. Depending on your role and your rights within the application, you can:
View the resource's current status and last update date/time in the Info tab.
Click the Comments tabs to view any comments entered when the resource's status was last updated.
Click the View Info link to open the resource's View Resource Detail page.
Edit the resource's detail by clicking Edit Info. The Edit Resource page opens.
Click the Update Status link to update the resource's status.
View the event's description and location and other details.
Resource Statuses
The color of the icon indicates the status of the resource. For example, a standard color set might be:
Green - available; this is the resource you selected or this resource is involved in the selected event
Yellow/orange - limited availability; this is the resource you selected or this resource is involved in the selected event
Red - unavailable; this is the resource you selected or this resource is involved in the selected event
View Options
Use the controls in the right pane to modify the view or to move to another view.

You can do the following in this page:
Control | Description |
|---|---|
View Region Default | Click to view the region's default map. |
View My Default | Click to view your default map view. |
Save as Region Default | Click to save your current view as the region's default map view. The application saves your map configuration (viewable area, zoom level, the selected status type, and the selected resource types). This becomes the region's default map view. This option is available only if you have the right to specify a region's default view. |
Save as My Default | To save the current map view as your default, click Save as My Default. You can move the map around and select the options listed below and then click this button. The application saves your map configuration (viewable area, zoom level, the selected status type, and the selected resource types). This is the map you will see the next time you select View > Map. |
Find Resource | Select a resource from the list to quickly find that resource in the map. A pop-up opens in the map showing various details for the resource. Click the Info and Comments tabs in the pop-up, or click the View Info link to open the resource's View Resource Detail page. If your role can edit this resource and/or update its status, the pop-up also contains the Edit Info and/or Update Status links. |
Status Type | View the resources that report the status type you select. The icon color indicates the status of the resource. |
Event Resources | View only the resources that are involved in the event you select. The icons change color to show resource status. |
Resource Types | View the resources from the resource type you select. For example, to view dialysis resources, select the Dialysis check box and clear all other check boxes. The icons change color to show resource status. Note: If all resources in the list are selected, you can quickly select only one or two resources. First, click Select All. That clears all check boxes. Then select the check boxes for the resources you want to view. |