![]()
You can print or export the current view, including region views, your custom view, and a resource's details. If you have access to other regions, you can print or export their views as well. These options are accessed in the upper right corner of the View and Event Status pages.

Note: When you print a resource or event status view, you may find that the right side of the information is cut off. This can occur due to a setting in your browser. As a workaround, when your browser's Print window opens, change the orientation setting to Landscape and print the view again.
If you or your role has the Report - Status Snapshot right, you can take a "snapshot" of nearly any view at a specific point in its history and then print or export it. This can be useful in a number of scenarios, such as when you need to provide the information to a regulatory body.
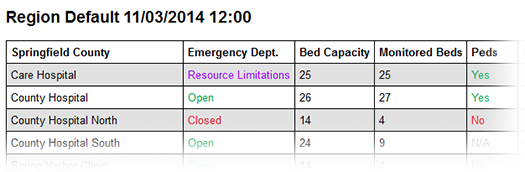
When printing, the generated report contains a section and table for each resource grouping in the view. The view's color coding is reflected in the snapshot.
When exporting, the generated spreadsheet contains a worksheet for each resource grouping in the view.

If the region view includes sub-resources, the primary sub-resource and its statuses are included in any snapshot you generate.
Snapshot
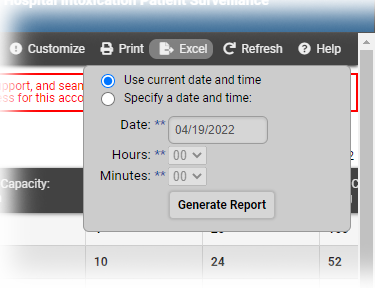
If you have the snapshot right, when you click print or excel you are presented with a couple of options. You can print or export the current view or specify a date and time.
This option is available for:
- Region views, include the Region Default.
- Other region's views to which you have access.
- Your custom view.
Note: The snapshot print and export options are not available for the Map view or the resource's detail view.
The snapshot:
- Is generated in PDF format (printing) or a spreadsheet format (exporting).
- Is formatted as a report.
- Information is organized in the same way as in the view.
If the view includes resources and/or status types that did not exist at the time of the snapshot, "N/A" appears as the status.
To print or export the current view
If you do not have snapshot rights:
- In the main menu, click View and then click the appropriate view.
- Click print or excel. When printing, your browser's Print window opens. When exporting, you can choose to open or save the spreadsheet.
If you have snapshot rights:
- In the main menu, click View and then click the appropriate view.
- Click print or excel. The option window opens.
- Select Use current date and time.
- Click Generate Report. When printing, your browser's Print window opens. When exporting, you can choose to open or save the spreadsheet.
To print or export a snapshot of the view
- In the main menu, click View menu and click the appropriate view.
- Click print or excel. The option window opens.
- Select Specify a date and time.
- Enter or select the Date.
- Select the Hours and Minutes.
Tip: Time is in 24-hour format. Example: 1:10 PM is 13 Hours and 10 Minutes. Click Generate Report. When printing, the snapshot opens in a new tab or window. When exporting, you can choose to open or save the file.
When printing, click Print.