![]()
There are several options available to show the status of a primary step or substep in your checklist. This article explains the relationship of the substeps to the primary step and how to use the available status options.
Note: If you are logged in to a specific incident, the checklists applicable to that incident appear on the page. If you are logged in to a Master view, an Incident drop-down list shows in the window. The incident you select from that drop-down list determines the incident with which the checklist data will be archived. Archiving is only available in previous releases.
Steps may have a due time associated with them. The time is based on the Incident Date/Time. If a step is (Blank) or open (O) and the time for completion (due time) has passed, the background color of the status field changes to red. The expiration status for the step changes to C when all the substeps are set to either C, N, or P. For more information on statuses, see Checklists.
To set the status of a step or substep
In the Tools section of the control panel menu, click Checklists.
If working in a Master view, on the Checklists page, click the Incident drop-down list and select the applicable incident.
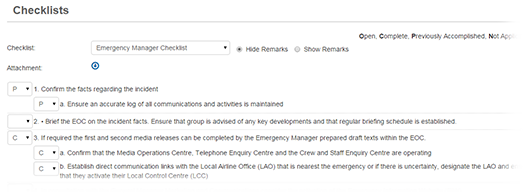
Click the Checklist drop-down list and select the appropriate checklist.

Click the drop-down list for the steps, and click one of the following options:
(Blank) – Not Started
C – Complete
N – Not Applicable
O – Open
P – Previously Accomplished