![]()
As you view inventory, keep the following in mind:
- You can view inventory at any level to which you have access.
- You can add inventory only at the sub location level.
- Use the search tool to locate an inventory item or a kit template. As you type the name in the search tool, the solution automatically displays the items and kits that match the text you enter.
On the Manage Inventory page, you can view inventory at the domain, region, location, or sub location. However, you can only add and edit inventory for sub locations.
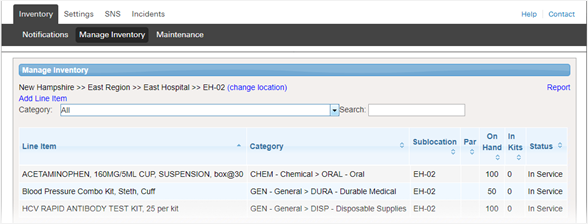
To view inventory
- On the Inventory tab, click Manage Inventory. The Manage Inventory page
- Click change location. The domain hierarchy window opens.
- Click the domain, region, location, or sub location you want to review. The page shows all inventory belonging to the selected level.
- To refine your list of inventory, take these actions.
- In the Category list, click a single category. To clear the selection, click All.
- In the Search, enter all or part of the category, item, or kit name. To view all items, clear your entry.
- To sort the inventory list, click a column header once for alphabetic or numeric order or twice for the reverse order.
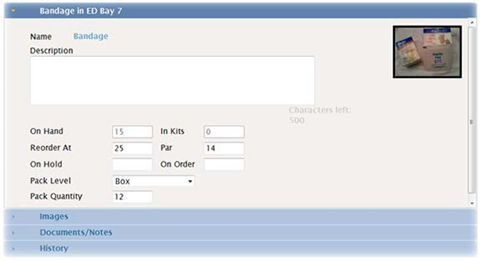
To view a line item's details
At a location or sub location, you can view the details for a line item by clicking it in the list.
Information about the item is grouped in drawers. By default, the item detail drawer opens; the line item's name and sub location appear in the title bar. You can view the quantity (on hand and par), as well as size, pack, lot number, and manufacturer information. This drawer also provides access to each record of inventory received.
Click the other drawers to view additional details, such as images and documents associated with the item, notes entered, and the history of the item. History includes the date a quantity was added to this sub location and the user who added it.