| HideElements | ||||||||||||||||||||||||||||||||||
|---|---|---|---|---|---|---|---|---|---|---|---|---|---|---|---|---|---|---|---|---|---|---|---|---|---|---|---|---|---|---|---|---|---|---|
|
| Background Color | ||||||||||||
|---|---|---|---|---|---|---|---|---|---|---|---|---|
| ||||||||||||
|
When you add a contact to eICS,
you must determine if they are an internal or external contact. External contacts can be selected to receive notifications, but they do not have access to log in to the solution.
Note: To change a user's login email, you must simply create a new account with the new login email and deactivate or delete the account with the old login email.
Important: If you want the person to have access to the solution, you must provide a login email. Then, the person will receive a welcome email, through which they must activate their account. For more information, go to Activate Your Account.
To add a new contact
On the Home page, point to the Planning menu and click Contacts. The Contacts for page opens.
In the Contacts for
Tip: If you want the contact to have access to eICS, you must enable their account by providing a username, a phone number and an email address.
To search for a contact
On the Home page, point to the Planning menu and click Contacts. The Contacts for (facility/domain) page opens.
list, click the name of the facility.
Contacts for the selected facility
appear below.
Below the
contacts, click Add New Contact. The Add New Contact, Details opens on the right.

In the upper right, in the Search box, type all or part of the contact’s first or last name, organization name, or phone number.
Click the search or magnifying glass icon. The search results open.
Do one of the following:
If the contact is in your results, go to the procedure Add an Existing Contact.
If the contact is not in your results, go to the procedure Add a New Contact.
To add an existing contact
On the Planning > Contacts page, with your search results open on the right, click the contact’s name.
- In the Facility Access list, click the level of access
- you want to grant this contact.
Click Create. The contact is added to the facility.
If necessary, you can add or edit contact details and click Save.
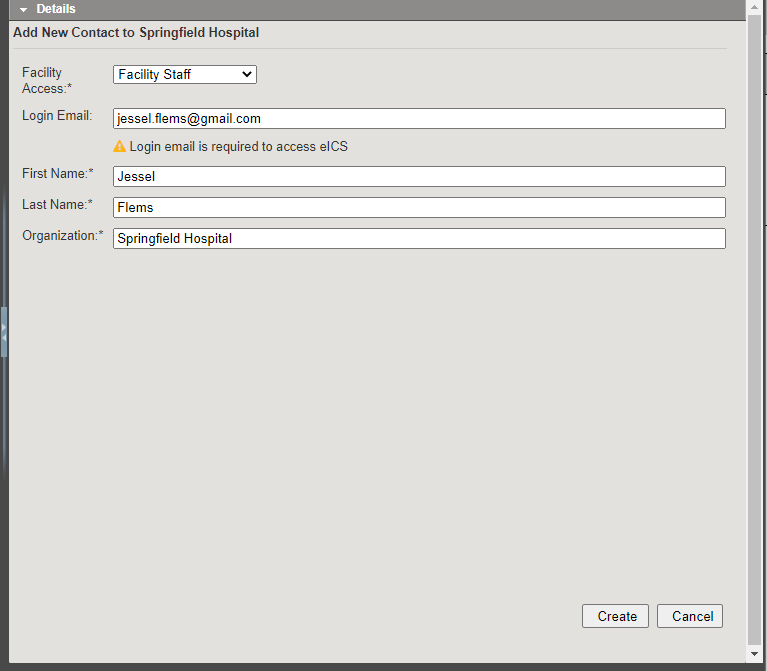
To add a new contact
- Enter the contact's Login Email (this must be a unique email at which the contact can receive and respond to emails).
Enter the contact's First Name, Last Name, and Organization
On the Planning > Contacts page, with your search results on the right in the Details panel, click Cancel.
On the right, enter the contact’s Name, Organization, Resource Type, Phone, Email, and Facility Access.
.
Click Create. The contact appears in the list on the left and the contact details refresh on the right.
On the right, click to
open drawers and add or change
Tip: You can add notes about the contact and changes you made to the contact's information in the Notes drawer.
| borderColor | #000000 |
|---|---|
| titleColor | #000000 |
| titleBGColor | #D3D3D3 |
| title | Helpful Links |
additional information.