| HideElements | ||||||||||||||||||||||||||||||||||
|---|---|---|---|---|---|---|---|---|---|---|---|---|---|---|---|---|---|---|---|---|---|---|---|---|---|---|---|---|---|---|---|---|---|---|
|
| Background Color | ||||||||||||
|---|---|---|---|---|---|---|---|---|---|---|---|---|
| ||||||||||||
|
If you have access to edit Standard and Event Status Types, you can update these status types in bulk via the Bulk Upload Template, which is accessed through Upload in the main navigation bar.
The Bulk Status Upload option allows you to update Resource Status Types for one or more resources by simply downloading the template, entering the status types, and uploading the information in an Excel or comma-separated values (CSV) file.

Important: You must download the Bulk Upload Template to populate the resources and status types that you have access to update. Any status types that you do not want to update can be left empty and the current value will be retained.
If you have access to edit Standard and Event Status Types, you can update these status types in bulkbulk. To get started, download the template, update the resource status types, and then upload the information.
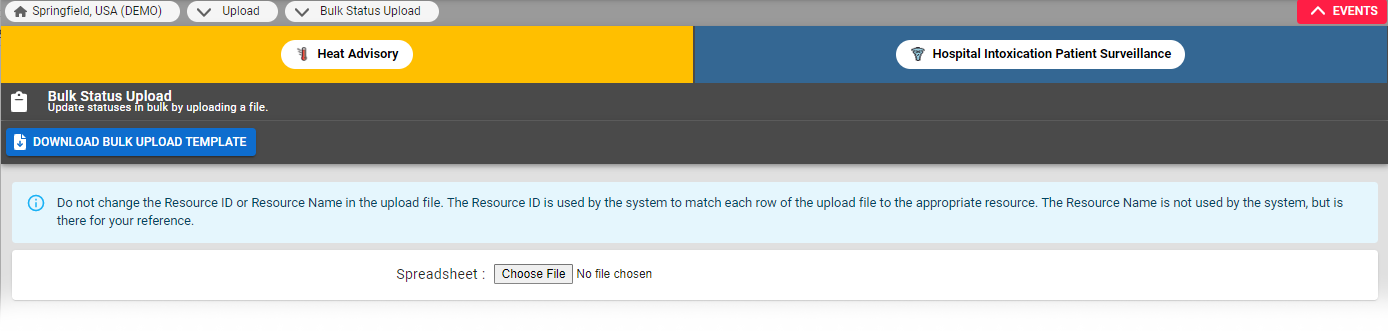
To download the template
- In the main menu, click Upload and then click Bulk Status Upload. The Batch Bulk Status Upload page opens.
- On the left, click Download Bulk Upload Template.
Note: If the template does not download, verify that pop-ups are allowed for this website through your browser. - Enter your status type updates in the template file and save it.
To upload the spreadsheet
- In the main menu, click Upload and then click Bulk Status Upload. The Batch Bulk Status Upload page opens.
- Click Choose File.
- Through the browser window, locate and click the name of the file you want to upload.
- Click Open.
- When the spreadsheet is attached, a green checkmark appears next to the file name.
- To begin the upload, click Submit Values. When the file is uploaded, the resources and status updates appear below. The information is available on this page until you navigate away. After that, you can find the information for the last 90 days through the Jobs tab.

- In the event that one of your status updates fails, an error message appears and none of the updates for that resource are submitted.

Note: While the spreadsheet is processing, you can continue to navigate around the application. To view the file status when you are ready and for the next 90 days, point to Jobs and, in the menu, click Jobs List.