As Domain Administration, you can edit the details for a facility. You can also add or edit Command Center information and customized Incident Dashboard tabs. Although most details of a facility are editable, a few restrictions apply. Regardless of your permissions, you cannot change a facility's domain. Additionally, only specifically authorized users can change a facility's health system.
For more details on customizing tabs for the facility, refer to Custom Incident Dashboard Tabs.
To edit a facility's general information
Point to Planning and click Facilities. The Facility Administration page opens.
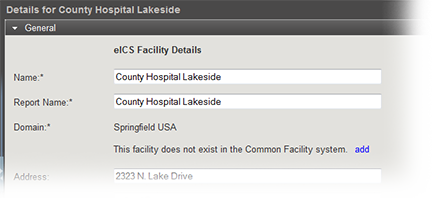
In the left pane, select the facility you want to edit. The right viewing pane shows the General drawer for the facility.
If appropriate, change the facility's name and/or report name.
Enter or change the facility's address.
Click locate on map. The Common Facility Map window opens.
Click the down arrow icon to populate the Latitude and Longitude for the address you specified.
Tip: You can do the reverse as well. In the General tab, enter the latitude and longitude and use the Locate on Map feature to determine the address.Click OK. The map window closes.
Select the facility type.
Click Save.
To edit a facility's details
Note: You may not be able to unlock some plans. Your domain has control over which plans are editable.
Point to Planning and click Facilities. The Facility Administration page opens.
In the left pane, select the facility you want to edit. The right viewing pane shows the General drawer for the facility.
Click the Details drawer.
To change the facility's health system, click Change and select a different system.
If appropriate, click Change next to Available Plans. The Available Plans window opens.
Select or clear the Available check box for this facility, indicating whether the plan is available to users.
Select or clear the Locked check box, indicating whether the plan's chart can be changed by users.
Click OK. The plans window closes.
Select or clear the Share Incident Data with WebEOC check box.
In the Command Center Details section, edit the Command Center's phone, fax, and/or location, as appropriate.
In the Incident Dashboard Tabs section, enter or edit the following for each tab, as appropriate:
Enter the name of the tab. This is the name that appears in the dashboard's tab.
Enter the URL. You must enter the entire website address, including http:// or https://, as appropriate.
Click View to test the website. If the URL is correct, the website opens in a new browser window.
If you want to add more custom tab options, click Add Tab, and repeat these steps.
Click Save.
Note: If a site you are adding is likely to contain nonsecure or mixed content, an icon appears next to the website name and the URL field is outlined in the same color as the icon. The system also generates a warning message when you save this information.